
Hi, guys! I’m Sarah of The Ridiculous Sort, and I’m going to show you how to make an absurd patriotic embroidery thing. You may hang your head in shame, you may celebrate, I don’t know. Either/or.
Anyway, let’s just jump right into it, yeah? Embroidery is pretty easy once you figure out the basic stitches. This project only requires two stitches: a backstitch, and a colonial knot. Both are pretty straightforward, and you can knock this thing out in under two hours. I definitely recommend listening to a good podcast while doing this, like Welcome to Night Vale.
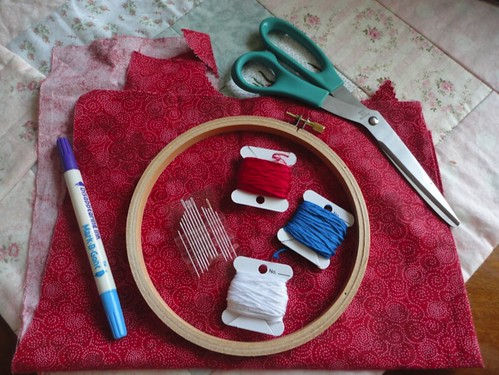
First things first: get your stuff together. You’ll need:
• Fabric (any print, colour, whatever. Just remember that cotton works best)
• An embroidery hoop of any size
• Embroidery needles (these have larger eyes than regular sewing needles)
• Embroidery floss
• Scissors
• A marking device if you need one
To start off, you’ll put your fabric into your hoop. Make sure the fabric is taught, as looseness just complicates things unnecessarily, and that’s the last thing you’ll want. Then you can cut off a fairly long piece of embroidery floss, thread a needle, and knot one end. Though you can do these two steps in whichever order just feels right to you.
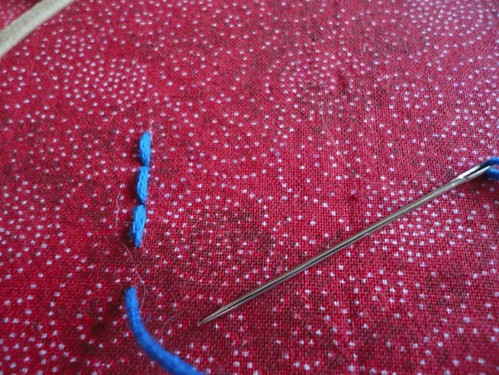
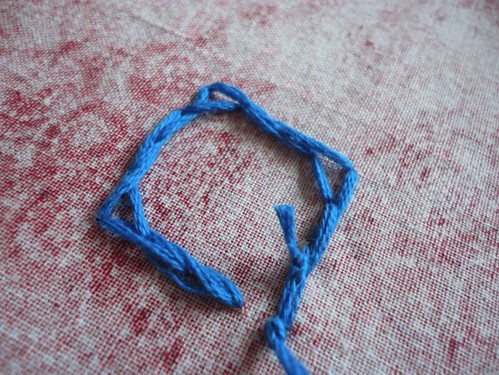
I used a backstitch for the blue box (for the stars) and all of the stripes. Now, this flag has less than thirteen stripes and far less than fifty stars, but whatever. Limited room and all that. The backstitch is usually used for outlines and lettering, since it’s wonderfully useful.
To do a proper backstitch, make one regular stitch, whichever size you think will suit things best. Then, bring the needle up a stitch length away from that first stitch and then push the needle and thread into the hole created at the end of that first stitch. I promise that makes much more sense in picture form. Here, look:

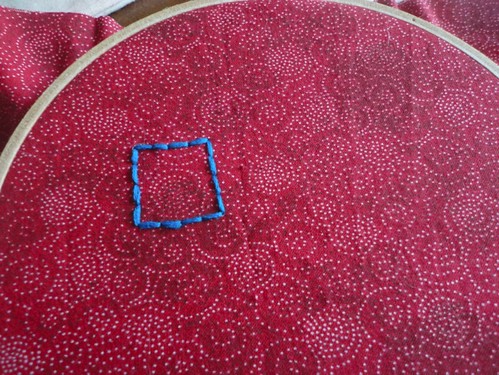
This is what your square will look like on the back:
And on the front:
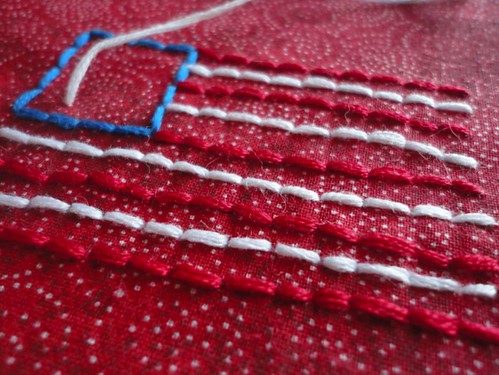
We then add stripes, in alternating colours, as per the American flag. Cause, come on, guys. Merka.
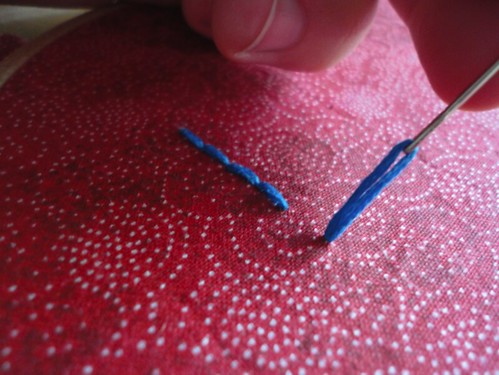
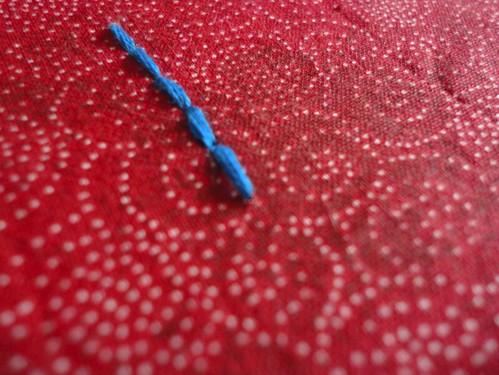
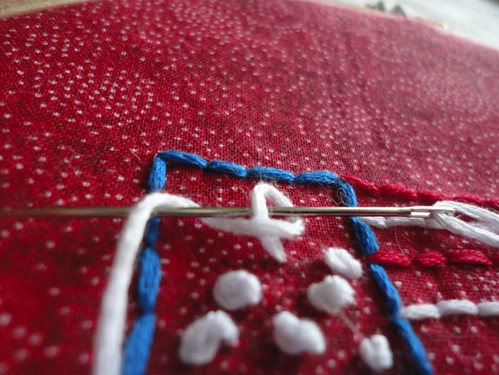
Now for those knots/stars! For a colonial knot, you bring the thread up where you want the knot. You make a loop and…
You know what, this is best explained through pictures as well.
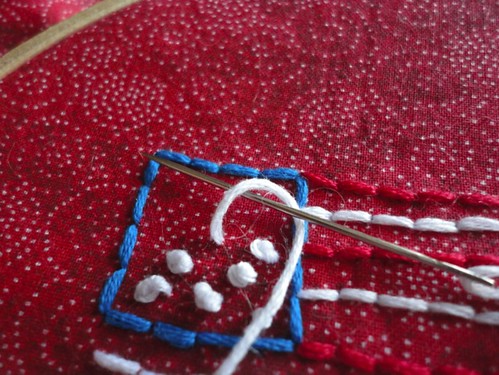

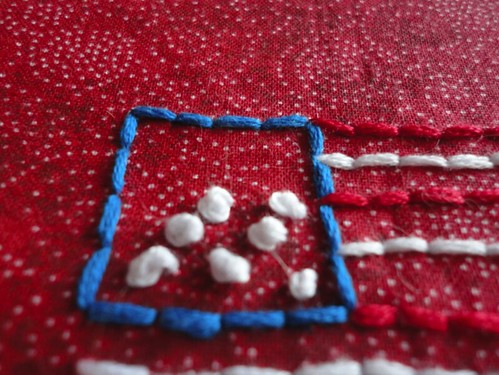
So lovely!
For the words, I split my floss so that each was three strands instead of six. You’ll see the difference this makes. I simply did a backstitch and felt silly for what I was writing out.
Once you’re done, you can either hem and edge your thing, or you can do what I did and keep it in the hoop as a frame, cutting away all excess fabric. Here you go, here’s that lovely final product.
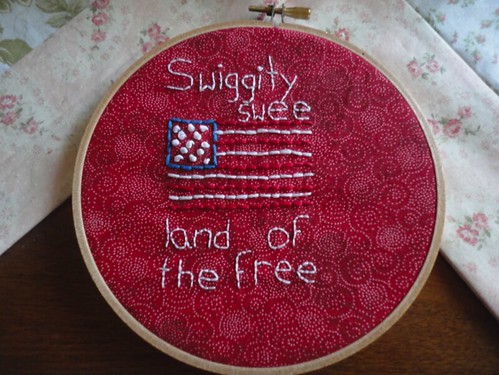
I dotted the I’s with colonial knots, but aside from that, it’s all backstitch and shame.
I hope you guys enjoyed this silly little thing, and I hope you go out and fill the world with terrible rhyming embroidery projects!
No comments:
Post a Comment